
|
 Home Home
 Projects Projects
 Experiments Experiments
 Circuits Circuits
 Theory Theory
 BLOG BLOG
 PIC Tutorials PIC Tutorials
 Time for Science Time for Science
|
| ||
|
Creating a new project in MPLAB You are ready now to create a new project. You could as well edit a single file, but making each time a new project, even for simple little things such as LED flashers and staff, is very important for archiving, practicing and ease of programming. From now on, each tutorial that is presented, shall be a new project. Therefore, it is highly advised that you make a dedicated folder for our tutorials. For example, i shall use the folder "E:\Electronics\PIC-Tutorials\". Within this folder i will make each time a new sub-folder with the name of the tutorial (Tuto1-1, Tutor-2 etc). If you follow the same rule, it will be easier to follow and archive the tutorials as well. With no further ado, here are the steps to create a new project. The name shall be "Tutor-1" and the folder "E:\Electronics\PIC-Tutorials\Tutor-1": This is how the MPLAB looks like when you start it at first time: 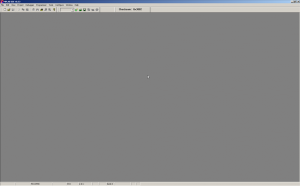
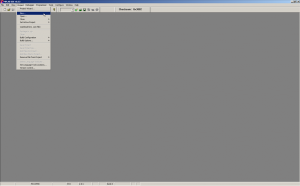 You go to Menu Project -> New 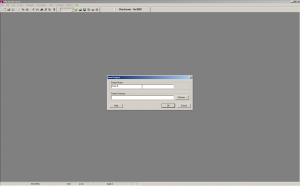 The "New project" dialog opens. In the "Project name" textbox you type the project name. In our case, this will be "Tutor-1". 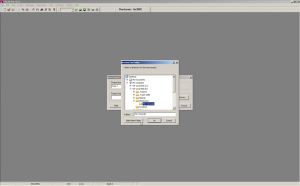 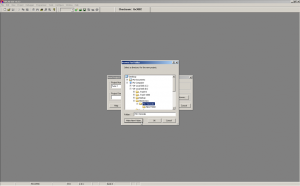 You click on the button "Browse". Then, you select the main directory where you will host the subdirectory of your project. In our case, this directory is the "E:\Electronics\PIC-Tutorials\". Then, you click the button "Make New Folder" at the bottom left side of this dialog. When you do this, the browser dialog shall become like the right photo. 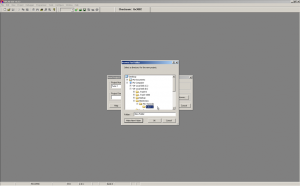 A "New folder" has been placed inside the main folder. You need to rename this folder. You use normal Windows procedures to rename the folder. In our case we name it "Tutor-1"  There is a constant Windows bug from old versions. When you rename a folder and the folder is selected, the textbox marked "Folder" right under the browser has still the name "New Folder" instead of the new folder's name. Therefore, you need to click to another folder (for example the "PIC-Tutorials" right above your new one) and then click back your new folder. Then, the textbox will have the appropriate name shown. In our case "Tutor-1". 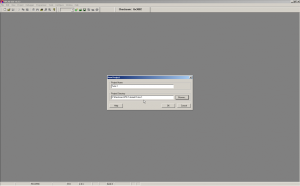 When you click the "OK" button, your dialog should look like the left picture. If everything is ok, you go on by clicking the "OK" button. 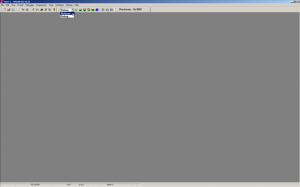 Then, on the top side, right under the menus, there is a drop down box with the selections "Release" and "Debug". Make sure that the "Release" option is selected. 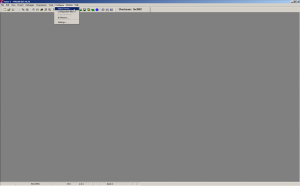 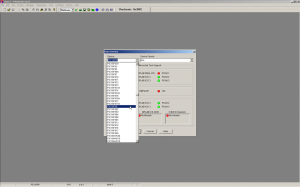 Go to the menu Configure -> Select Device. When you do so, a dialog like the right image will be appeared. Select the device "PIC16F88" that we will use in all of our tutorials. Click "Ok" 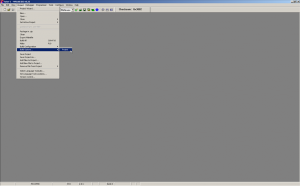 Click on the menu Project -> Build options... -> Project 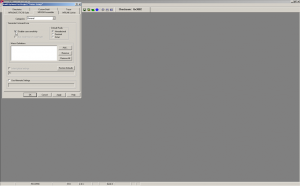 The "Buld options" dialog appears. Go to the tab labeled "MPASM Assembler" and make sure the checkbox "Disable case sensitivity" is checked. Then, click "Ok". 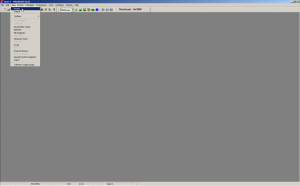  Make sure the menus View -> Project and View -> Output are marked as shown in the left and right images. 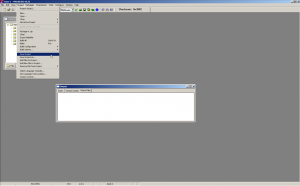 You're almost done. You only need to save your new project. Just click on the menu Project -> Save Project That's it. If you have followed the steps correctly, then you should have a new project created, named "Tutor-1", in a folder named "Tutor-1" somewhere in your file system. Comments
No part of this publication may be reproduced, stored in a retrieval system or transmitted in any form or by any means, electronic, mechanical, photocopying, recording, scanning or otherwise without the prior written permission of the author. Read the Disclaimer
All trademarks used are properties of their respective owners.
Copyright © 2007-2009 Lazaridis Giorgos. All rights reserved. |
  
|
 Contact Contact
 Forum
Projects
Experiments
Circuits
Theory
BLOG
PIC Tutorials
Time for Science Forum
Projects
Experiments
Circuits
Theory
BLOG
PIC Tutorials
Time for Science
 RSS RSS
Site design: Giorgos Lazaridis © Copyright 2008 Please read the Terms of services and the Privacy policy |


