PAGE 2 of 2 - Laminating
Place the printed label into a laminating pouch and insert into a laminator.Pouch and Label| | 
Inkjet label |
Ready to laminate | | 
label in pouch |
Trim the laminated label to size| | 
Partially trimmed label |
Completed label before punching holes| | 
Ready for holes |
Label after holes punched| | 
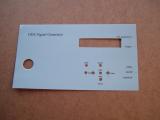
Completed label |
Glue label to the panel of your project.| | 
First attempt |
Note:
I used contact adhesive, but I discovered a few text errors so I replaced the label, the glue had melted part of the plastic case, so I should have checked the solvent in the glue against the plastic the box was made of.
Another method of sticking the label to the panel is to smear it with a thin coat of neutral cure silicone.
Comments
At 21 May 2012, 16:37:05 user Pantelis wrote: [reply @ Pantelis]the 1st solution is very expensive, the second is the best, i sent an email to http://www.officeworks.com.au/retail/content/Home to sent me the laminator Lowell 280 but the sait is in Australia and they cannot sent it to Greece ,what a pity!!!
At 21 May 2012, 13:28:12 user George wrote: [reply @ George]Standard laminators do not get hot enough for toner transfer, HOWEVER there are a few guides online that show how to modify "some" laminators for transfer method.Refer to pcbfx.com (they sell toner transfer products, and have some guides for modifying laminators, and also there is a mod guide on ultrakeet.com.au.
http://pcbfx.com/main_site/pages/tech_support/instructions/Laminator_Modifications/index.html
http://ultrakeet.com.au/index.php?id=article&name=superFuserV2
Cheers
At 21 May 2012, 12:51:52 user Pantelis wrote: [reply @ Pantelis]Hi, very nice work, do you know if this laminator is suitable for using it as hot laminator that push the printed pcb laser paper to the pcb, because the method with the uv lamps and photo resisted pcb is expensive for me |
|
 HOT in heaven! HOT in heaven!

|
|

 Home
Home
 Projects
 Experiments
 Circuits
 Theory
 BLOG
BLOG
 PIC Tutorials
 Time for Science
 Contact
 Forum
Forum
 Projects
 Experiments
 Circuits
 Theory
 BLOG
BLOG
 PIC Tutorials
 Time for Science
 RSS
RSS